Discover Vectary Business solutions for AC unit companies
Get a quick guided product tour. Your questions - answered.


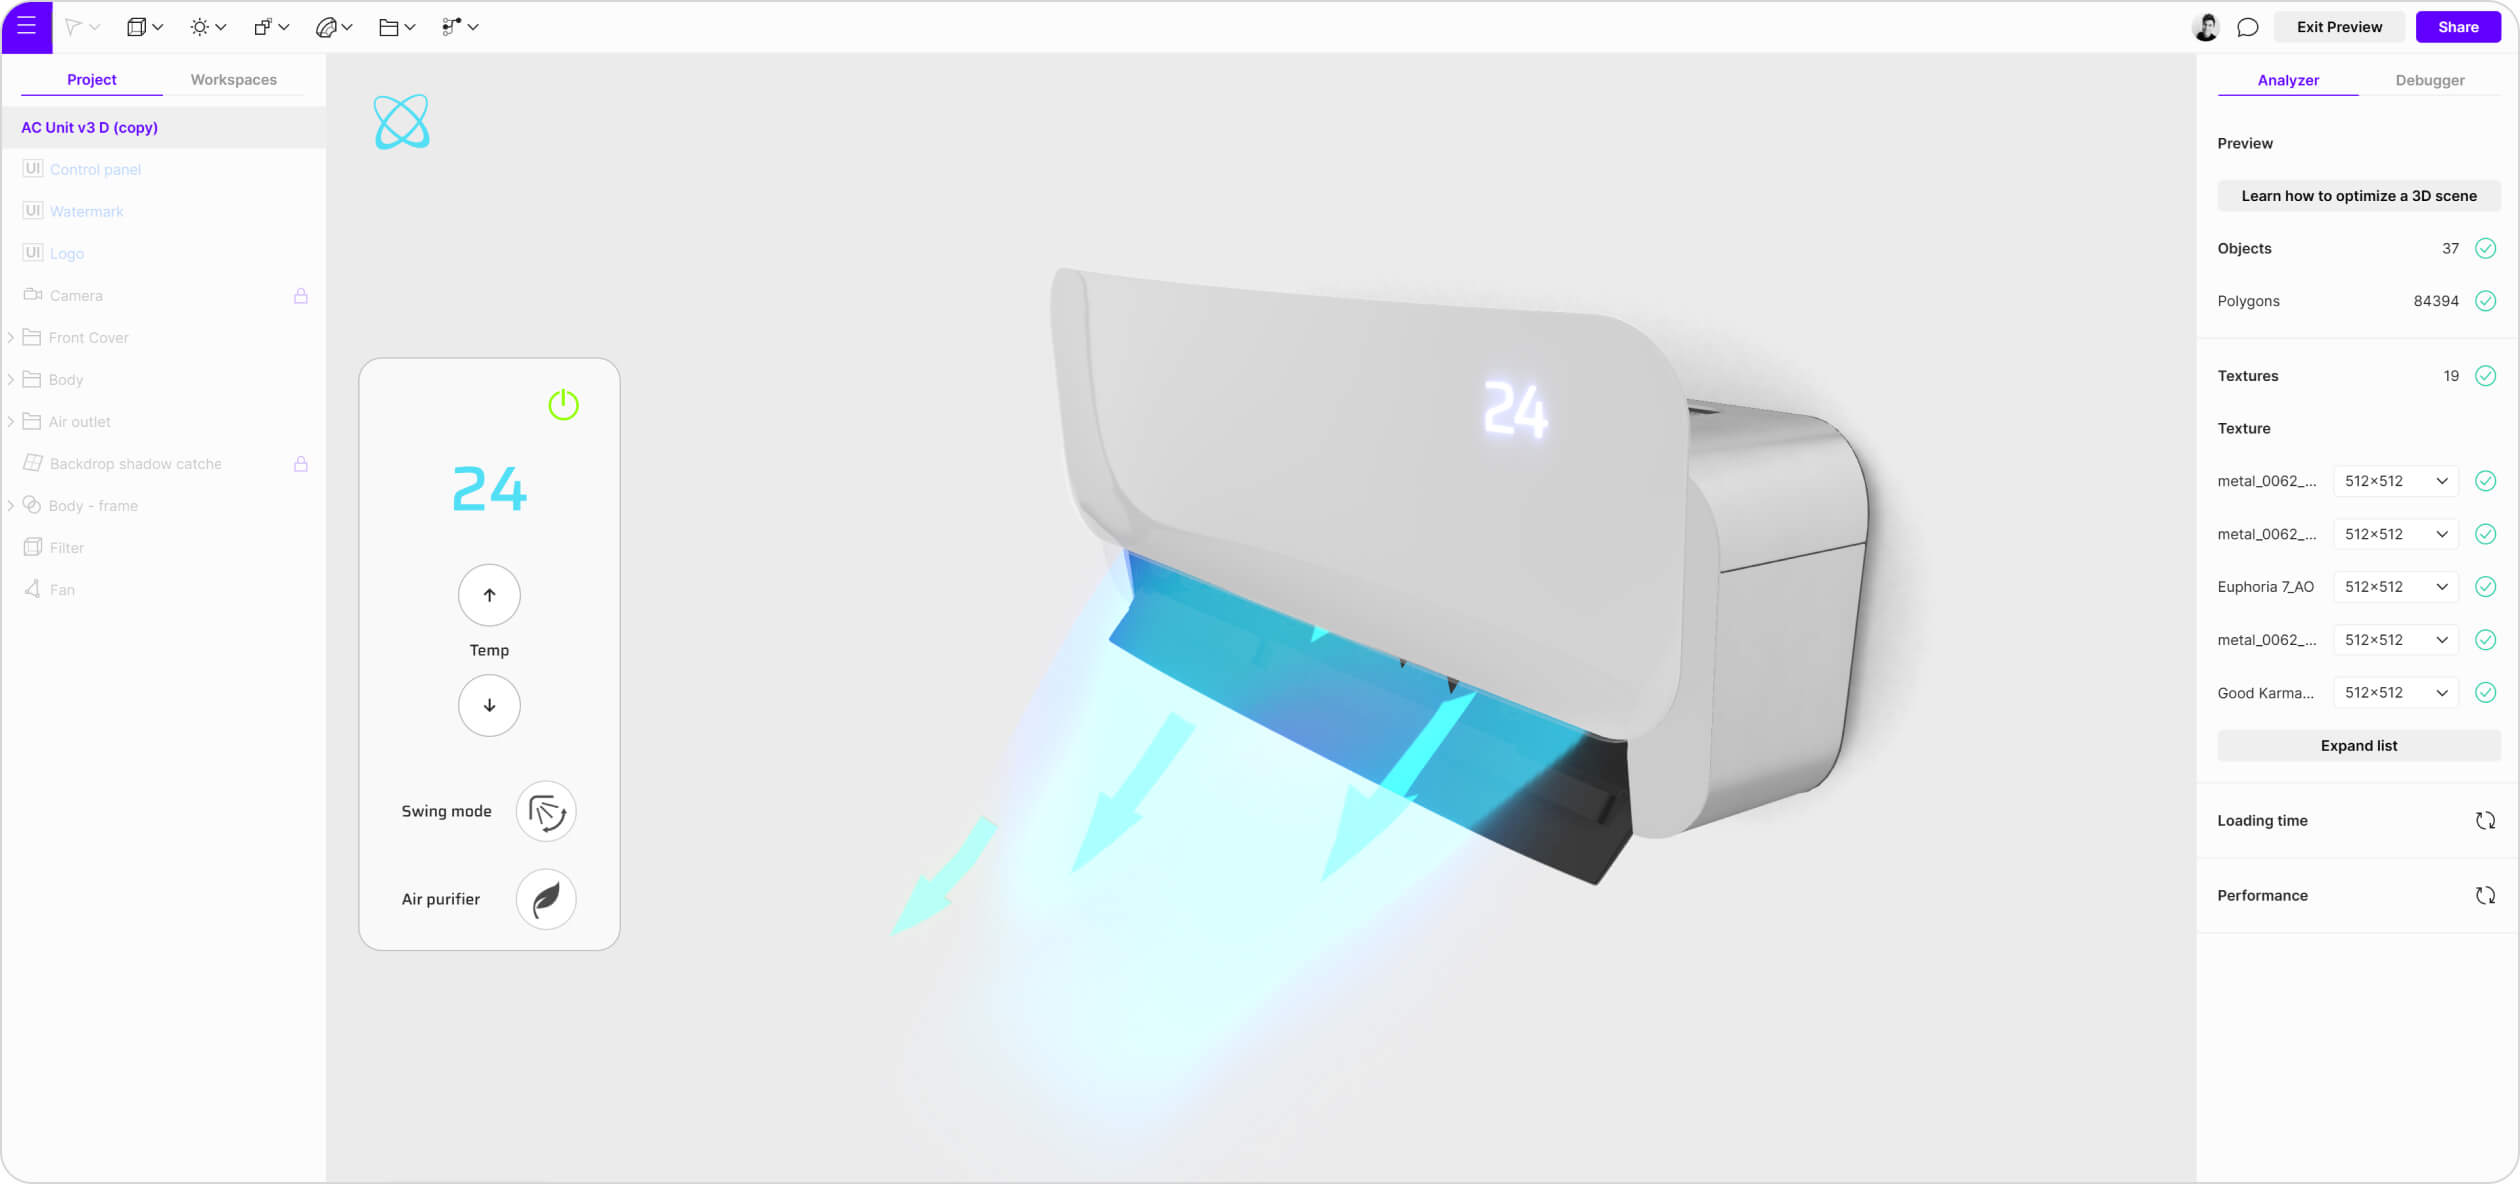
The configurator can be used as a dynamic visualization of the system's operation as specified by the product design teams. It easily becomes a useful tool for multiple departments that lets the user observe the real-time performance of the AC unit, the material composition, as well as see the dimensions and the user interface. The air conditioning unit configurator is also a digital visualization that lets consumers set up and test the cooling system in real-time by selecting details for cooling requirements, and energy efficiency preferences.
The goal of this AC unit configurator is to explain all the functionalities using custom Floating UI, interactions and animations.
Floating UI needs to:
Animation should:
The project was modeled from scratch in Vectary Studio using primitive objects, edit mode, and modifiers. The top part of the AC unit was first drawn in Figma and imported as an .svg file, where it was converted into geometry and used in a boolean to create the cutout.
Let's split this project into a few categories, starting with animations. There are a total of four animations: Start, Stop, Fan, and Swing mode. As their names suggest, each one performs a specific function.
Creating multiple animations instead of just one gives you more control over them. When setting up interactions, you can create the feeling of one continuous animation using delays set to specific lengths based on their duration. This way, one animation starts when the previous one finishes. This method provides much better control over the animations later when pairing them with floating UI elements and setting up interactions. Don't forget to set up the right conditions; otherwise, the order might not work. For example, Swing mode triggers the swing animation, which can only be played once the Start animation is finished.
The whole scene is set to a neutral light grey/white color scheme. Indoor AC units usually blend in with the room and do not attract much attention, which is why we chose white color and metallic materials. A cool design feature of this particular AC is the front cover that conceals the internal components when the device is not working. On top of the cover, there is a thin piece of geometry with a glass material applied, giving it depth and nice reflections. Temperature and icons are placed underneath this glass panel. A lightmap was baked on the outer parts, while ambient occlusion (AO) was used for the internal ones. AO textures are smaller in size compared to lightmaps, making them ideal for areas where high detail is not needed.
Animated materials are applied to two planes with noise and bend modifiers using Lottie files in the .json format, both set to emissive with some opacity.
Tip: The ground plane cannot be rotated. To have a nicely evenly spread shadow on the wall behind the AC unit, use a plane with a baked AO map.
The floating UI mimics a simplified version of a real AC remote controller. It includes an on/off button, increase/decrease temperature buttons, and buttons to turn on/off swing mode and air filtration. The visibility of the FUI can be toggled by clicking on the logo icon in the corner, ensuring the FUI does not cover the canvas all the time.
The air purifier icon triggers the visibility of two icon states: one with a color indicating off and one in green indicating it’s on. It also triggers the visibility of a 3D leaf icon in the actual AC unit.
The Swing mode triggers the Swing animation with a condition that the Start animation is finished.
The power button icon uses a trick with two icons switching with hide/unhide interactions, eliminating the need for defining conditions. The power button triggers multiple actions such as showing airflow with animated materials, showing the power button state as On, playing the Start animation, and showing the temperature with 3D text. The power button off then triggers the Stop animation and hides the animated airflow materials with arrows.

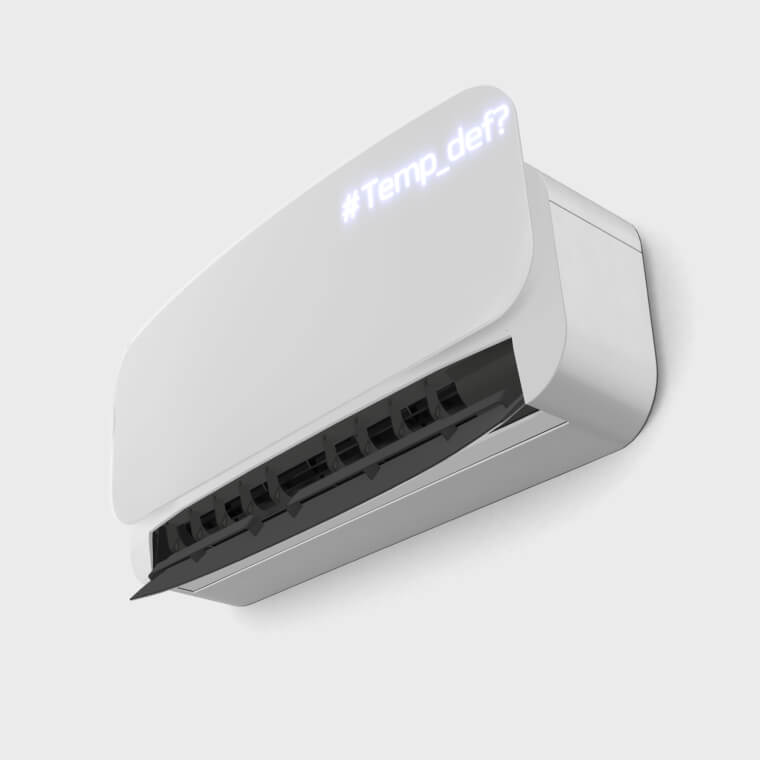
The most important aspect of this project is the use of Events, which define certain logic based on how elements behave. In this scene, events control the temperature settings. First, you need to set the on-load event value. We are using the Number type of event, where a new Temp_def event is created with a value set to 24. This means, once you open the project, the default temperature in the FUI and on the AC unit will be set to 24. You can insert this Temp_def into other elements in Studio, such as 3D text or the floating UI text field.
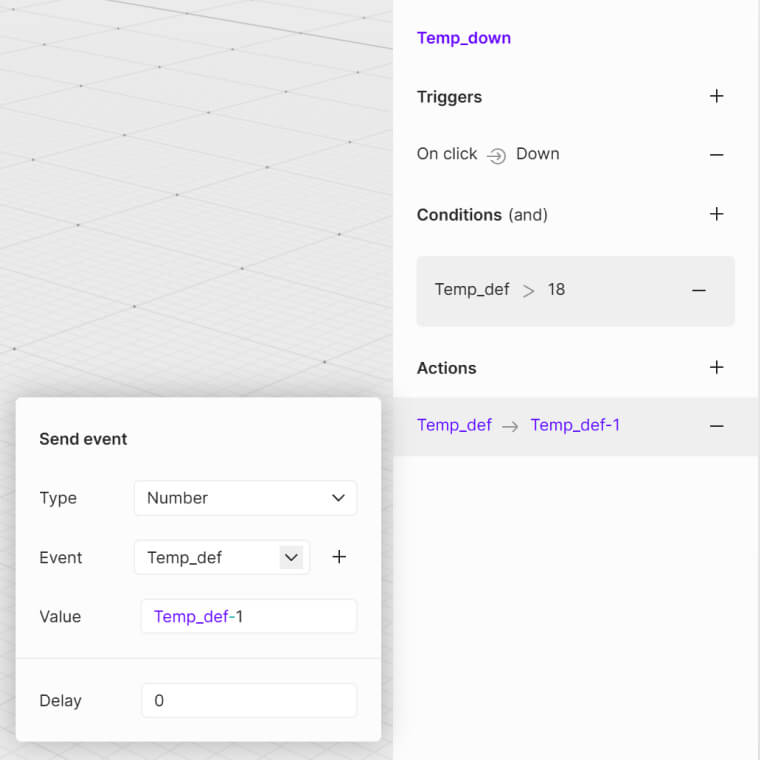
Next, you need to define that on click, the Temp_def will increase by one unit. The new interaction will look like:
The interaction to decrease the temperature is set to on click Down icon with a condition for the minimum event, type number, event Temp_def, and value greater than 18. The action is then set to event, type number, event Temp_def, and value Temp_def-1.
This setup will ensure that clicking the up or down icons will increase or decrease the temperature by 1, with a minimum of 18 and a maximum of 28.